
On this page
- What to Do in the First Minute When You Are Lost
- Stabilize before solving
- Make the useful call
- How to Regain Position on a VFR Flight
- Rebuild a position you can defend
- Don't make the chart agree by force
- How IFR Lost Communications Procedures Work
- Separate route from altitude
- Understand the clearance limit
- Partial Failures and the Choice to Land
- Match the decision to what remains usable
- Guard the scan while you troubleshoot
- How to Drill Lost Procedures Before the Flight
- Put a readable card on your kneeboard
- Rehearse decisions without creating a real failure
- Fly the Lost Call Before You Need It
- Make the first flight a learning session
- Ask practical questions before committing
You're looking at a training airplane's panel, wondering how you'll ever manage the map, radio, weather, and controls at the same time. Then a less comfortable question appears: what happens if you don't know where you are, or the controller stops answering?
The lost procedures aviation students need aren't just a transponder code or a memory exercise. They're a way to separate problems: control the airplane, establish what still works, check your position independently, and choose the procedure that matches the conditions.
What to Do in the First Minute When You Are Lost
The consequences of uncertain position can become much more serious when fuel is running out. The NTSB's Alaska accident material describes a Cessna T210 that ditched approximately 5.4 miles west-northwest of Ketchikan on August 1, 2008, following complete engine power loss, and a Bellanca 7GCAA that became disoriented near Columbia Glacier on July 2, 2005, exhausted its fuel, and force-landed approximately 6.5 miles northeast of Whittier.
In the Cessna investigation, inadequate planning and navigation, insufficient fuel, and geographic disorientation were central factors. In the Bellanca account, the only navigation equipment was a magnetic compass, which the pilot reported became erratic and even turned 180 degrees, according to the same NTSB material.
Those outcomes explain the priority order. Don't trade aircraft control and fuel for another attempt to make the situation fit your expectations.
First-minute lost procedure by situation
| Situation | First actions | Rule of thumb |
|---|---|---|
| Unsure of position, radio works | Level wings; note last fix, time, heading, altitude, and fuel; call ATC or Flight Service | Don't press an uncertain destination |
| VFR and two-way radio failed | Troubleshoot, squawk 7600, stay VFR, and select a suitable landing airport | For an IFR flight in visual conditions, § 91.185(b) requires landing as soon as practicable |
| IFR in IMC, radio failed | Squawk 7600 and fly the route and altitude hierarchy | Apply § 91.185(c); don't invent a route |
| Radio works, navigation suspect | Tell ATC, request vectors, and cross-check independent navigation | A GPS picture isn't proof by itself |
| Can hear ATC but cannot transmit | Recheck audio panel, microphone, and frequency; ident when requested | Confirm the failure promptly; receiving alone doesn't restore two-way contact |
Stabilize before solving
Say you expected a reservoir beside your route, but the water below doesn't match the chart. Your first job isn't to turn toward it. Level the wings, maintain a safe altitude, and trim so you aren't fighting the airplane while thinking.
Record the last checkpoint you identified, not the one you hoped you passed. Add heading, altitude, time, and fuel endurance. That snapshot gives both you and the controller something reliable to work from.
Make the useful call
Tell ATC your aircraft identification, the problem, last known position and time, altitude, heading, fuel endurance, and intentions. Plain language is better than silence while you search for perfect phraseology.
For example, tell the controller that you're uncertain of position and need position assistance. If fuel or weather makes the situation urgent, say that directly rather than merely asking for directions.
Practical rule: Call while you still have choices, not after you've used your fuel trying to prove you weren't lost.
Build the habit of maintaining situational awareness before every cross-country flight. Knowing what you last verified is more useful than sounding certain about an unverified location.
How to Regain Position on a VFR Flight
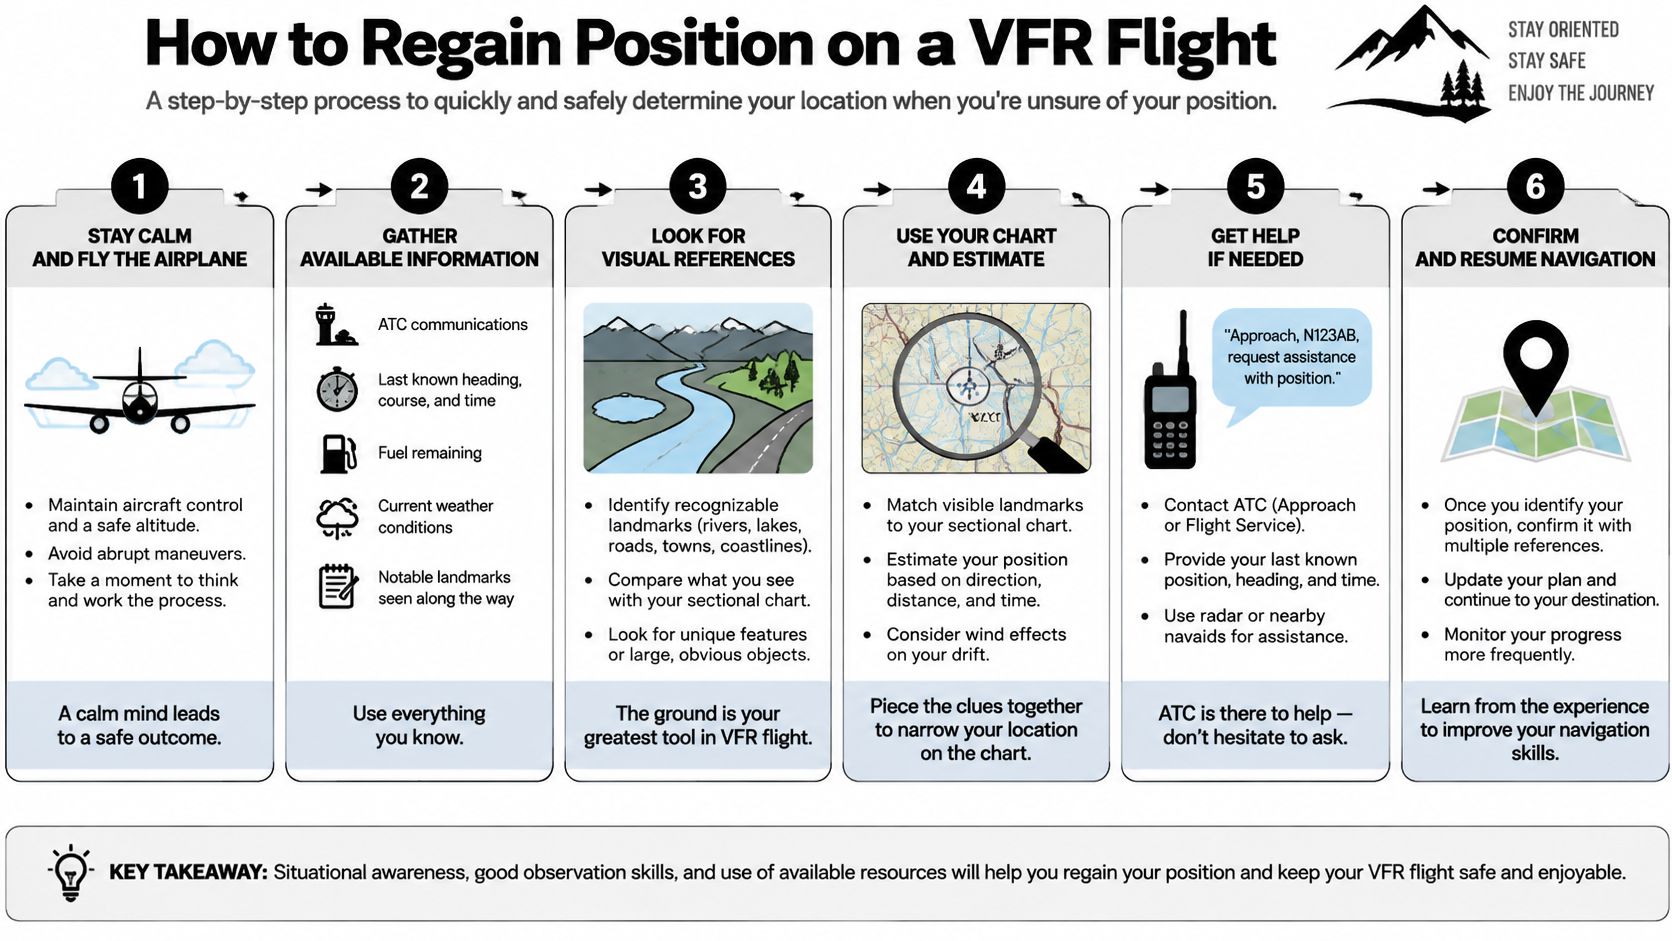
On a visual flight rules flight, a familiar-looking town isn't enough to establish position. You need agreement between the chart, the ground, your estimated progress, and whatever reliable navigation equipment remains available.
The FAA Aeronautical Information Manual describes pilotage as navigation by ground references and dead reckoning as navigation using heading, airspeed, wind, and time. These aren't obsolete skills. They give you a way to test an electronic position rather than believe it.
Rebuild a position you can defend
Stabilize and record. Level the wings at a safe VFR altitude. Write down heading, altitude, clock time, and fuel remaining so your working information doesn't change every time you look away.
Consider a climb, not an automatic climb. Greater height may improve the view and radio reception, but only climb when terrain, airspace, and weather allow it. Never climb into cloud to solve a visual-navigation problem.
Start at the last trusted checkpoint. Estimate your progress from the heading flown, elapsed time, groundspeed, and wind. Draw a likely track or search area rather than assuming the airplane followed the planned course exactly.
Find a large feature, then corroborate it. A shoreline, highway junction, river bend, or town is easier to identify than a small building. Match another nearby feature before accepting the fix, such as a road crossing on the correct side of a river.
Cross-check the instruments. Compare heading indications with the magnetic compass under suitable steady-flight conditions. If available and serviceable, use a VOR radial or DME distance; remember that a radial alone describes a line, not a unique position.
Ask for help early. Request position assistance or radar vectors from ATC. Flight Service can assist with information and coordination, but don't assume it can provide radar vectors itself.
Choose a suitable destination. Once you've confirmed position, assess fuel, weather, terrain, and airport suitability. Divert when continuing to the original destination would leave you with poor options.
Don't make the chart agree by force
Suppose you identify a highway beside a lake. Before calling that your position, check the highway's orientation, the shape of the shoreline, and the location of a nearby town. If those don't agree, reject the identification rather than explaining away every mismatch.
A GPS display deserves the same skepticism when something looks wrong. Check the selected waypoint, active leg, navigation mode, database information, and integrity indications; then compare the result with an independent source.
Practice reading sectional charts on the ground so those comparisons feel familiar in flight. A chart is much easier to use when you already recognize its terrain, airspace, and airport symbols.
Finding yourself doesn't automatically mean resuming the original plan. You've spent fuel and attention recovering position. Reassess the remainder of the flight with that reduced margin in mind.
How IFR Lost Communications Procedures Work
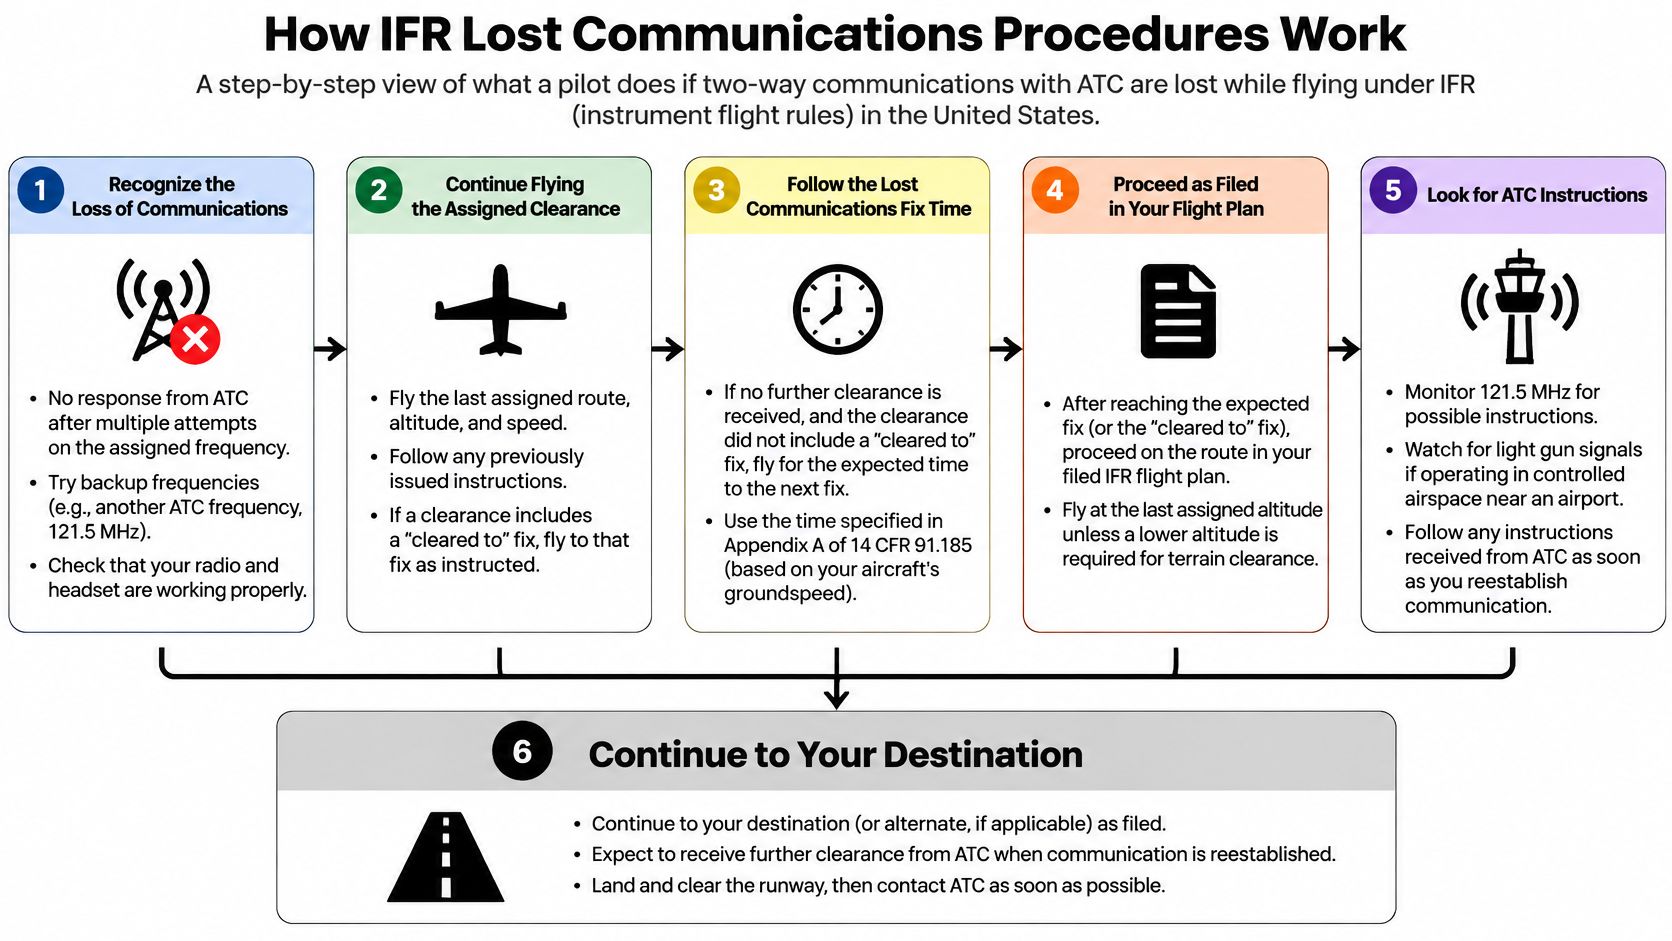
Visual conditions come first. Under 14 CFR § 91.185(b), an IFR pilot who loses two-way radio communications in VFR conditions, or encounters those conditions afterward, must continue under VFR and land as soon as practicable, unless otherwise authorized by ATC.
That doesn't mean landing immediately in an unsuitable place. It also doesn't mean continuing to a distant destination because the airplane can remain clear of cloud.
If instrument meteorological conditions prevent VFR continuation, the regulation's route, altitude, and clearance-limit provisions apply. Understanding the distinction between IFR and VFR matters here: an IFR clearance and the weather outside are different things.
Separate route from altitude
The route hierarchy tells you where to fly. The altitude hierarchy tells you how high to fly on each segment. Don't blend them into a vague instruction to keep doing whatever you were doing.
The FAA's lost-communications guidance explains the assigned, vectored, expected, and filed route order, together with the highest-applicable-altitude requirement.
IFR lost-communications route, altitude, and approach
| Choice | Fly this, in order | Common mistake |
|---|---|---|
| Route | Last assigned route; if vectored, direct to the fix, route, or airway specified in the vector clearance; otherwise expected route; otherwise filed route | Inventing a shortcut |
| Altitude | Highest applicable altitude for the segment among last assigned, minimum IFR altitude, and expected altitude | Staying at the last assigned altitude indefinitely |
| Approach | At an approach-fix clearance limit, begin descent and approach as close as possible to EFC, or the applicable ETA without EFC | Descending early at a limit that isn't an approach fix |
| VFR encountered | Continue under VFR and land as soon as practicable | Treating visual conditions as permission to finish the IFR plan |
| Transponder | Code 7600 while continuing the required navigation decisions | Assuming the code replaces the procedure |
A radar vector isn't an instruction to continue the assigned heading indefinitely after communications fail. The relevant route is the direct route to the fix, route, or airway specified in that vector clearance.
Likewise, highest applicable altitude requires a segment-by-segment assessment. An expected altitude tied to a later time or fix isn't automatically an immediate climb instruction.
Understand the clearance limit
A clearance limit is the point to which ATC has cleared you. It isn't necessarily the point where an approach begins.
When that limit is an approach fix, the descent-and-approach timing follows the expected-further-clearance time, or the applicable estimated arrival time if no EFC was received. That ETA is based on the filed or ATC-amended estimated time en route, not an arbitrary replacement arrival time.
If the limit isn't an approach fix, the regulation specifies when to leave it and proceed to a fix from which an approach begins. With an EFC, leave at that time; without one, leave upon arrival over the limit, then time the descent and approach as prescribed.
Keep attempting useful communication methods, including the previous frequency, Flight Service, and appropriate remote communications outlets. Blind transmissions can tell controllers what you intend even when you can't confirm they heard you.
Partial Failures and the Choice to Land
Squawking 7600 sends one message to ATC: my radios are down. That message says nothing about why. A microphone problem, an incorrect audio-panel selection, an unreliable navigation source, and a complete electrical failure can look identical from the controller's side of the frequency, yet each one calls for a different response in your cockpit. Work out what failed, then let the code report it.
Controllers also have alternatives to calling again on the same frequency. NTSB-published material on communications recovery describes methods including emergency frequencies, voice-capable navigation aids, Flight Service, and relays.
Partial failures play a trick on you. If you can hear ATC but cannot transmit, two-way communication is already gone even though voices still reach your headset. Troubleshoot promptly, answer any workable controller request such as an ident, and recognize the failure while reception remains.
Match the decision to what remains usable
After a partial failure, run a short inventory before you act. What still works? What kind of flying does the remaining equipment support? Keep an independent position check running too: cross-check the moving map against pilotage or a second approved source before you trust any single one. The answer usually sorts itself into one of three situations.
What to do when the failure is only partial
| What failed | What you do now | Decision |
|---|---|---|
| GPS or RAIM unreliable, radio works | Report the problem, request vectors, and use other approved navigation | Delay, reroute, or cancel rather than depend on an unreliable sensor |
| Radio and GNSS both unreliable | Use remaining approved navigation; use pilotage only in suitable visual conditions; obtain assistance through any working channel | Divert or land before fuel, terrain, or weather removes safe options |
| Oceanic or remote, outside domestic VHF coverage | Follow the applicable regional contingency procedure and use available communication channels | Apply oceanic procedures only in the airspace they were written for |
RAIM means receiver autonomous integrity monitoring, a check associated with certain GPS operations. A moving position symbol tells you the receiver is plotting something. It does not prove the system has the integrity your intended operation requires.
International communications guidance describes materially different domestic and oceanic procedures, including a 15-nautical-mile offset in the oceanic guidance discussed there, and alternatives when predicted RAIM availability is inadequate. Treat those as airspace-specific procedures. An offset that protects you over the ocean has no place in domestic U.S. airspace.
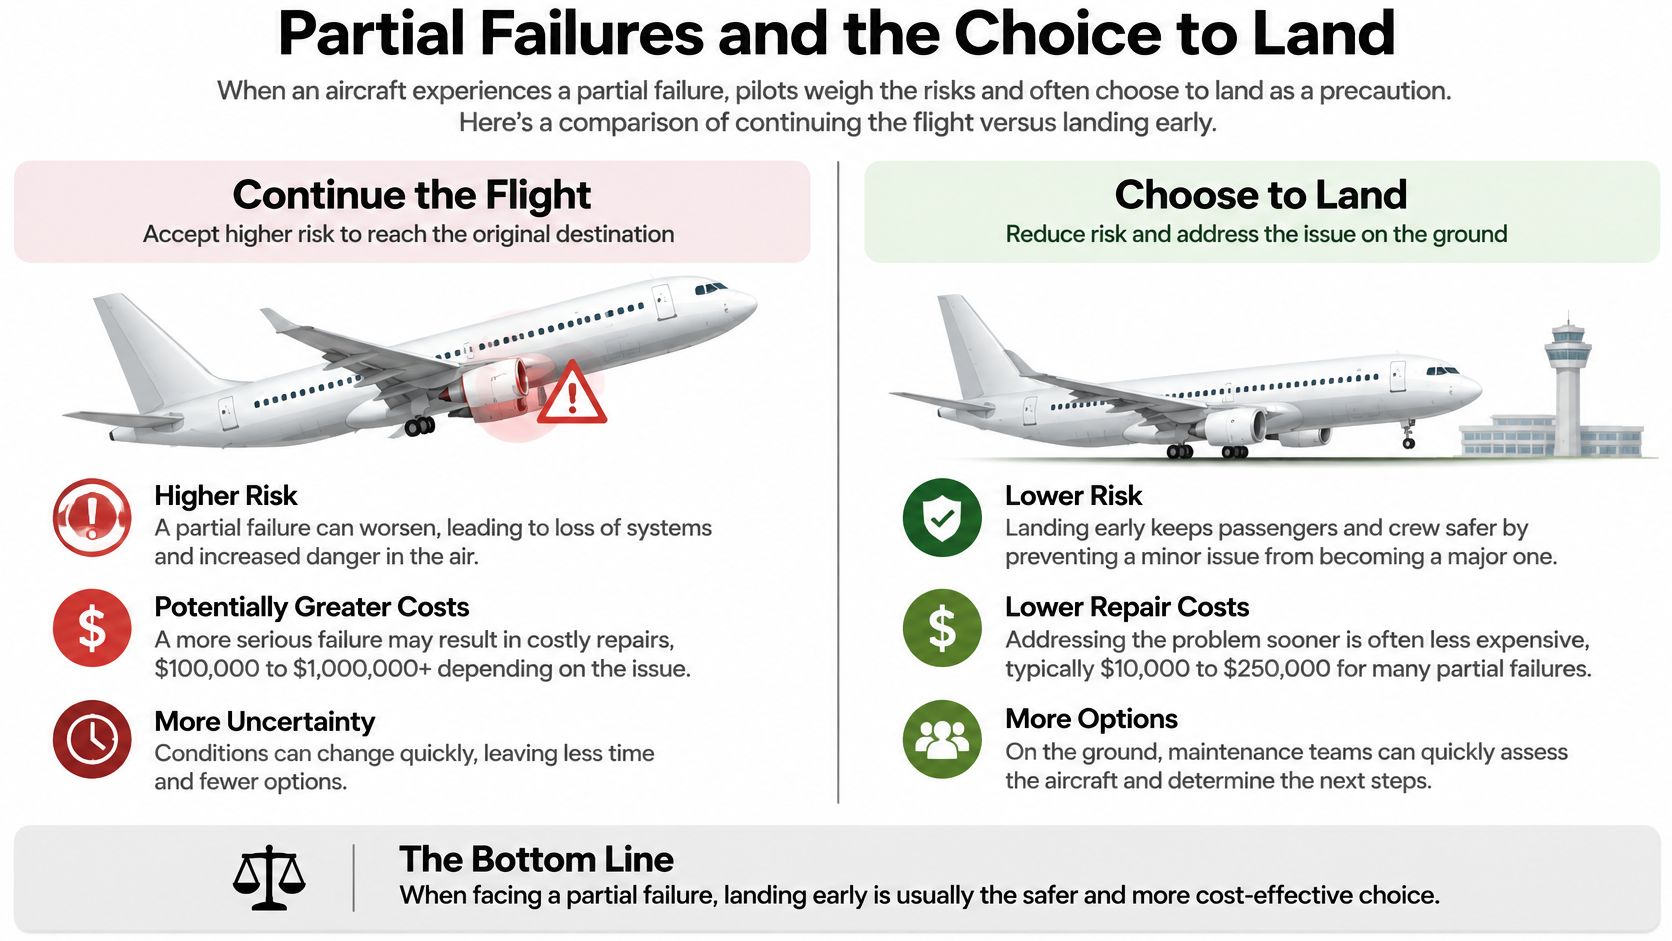
Where you land in this decision also depends on conditions. Under 14 CFR § 91.185, a failure in visual conditions sends you toward a landing as soon as practicable, while a failure in instrument conditions keeps you on the prescribed route and altitude. The regulation answers the procedure question. The judgment question stays with you: a degraded sensor, a shrinking fuel reserve, or weather moving across your diversion airport can each tip the balance toward ending the flight early. Land while landing is still a choice you get to make.
Guard the scan while you troubleshoot
In its discussion of a Piper PA-34 accident near Johnstown, New York, on May 24, 2013, NTSB investigation material identifies restricted visibility, turbulence, an unexpected off-course turn, GPS distraction, and spatial disorientation before loss of control and breakup.
That sequence is the reason instructors set a simple rule: any device you cannot operate while holding heading and altitude waits until the airplane is stable. A handheld, a knob, a menu page. Each one borrows attention from the scan, and the scan is what keeps the airplane upright.
Choose the safer airport before the diagnosis is complete.
Holding earns its fuel only when you can identify the holding location, fly it reliably, and stay clear of terrain and weather. Circling while uncertain of position burns fuel without building a plan.
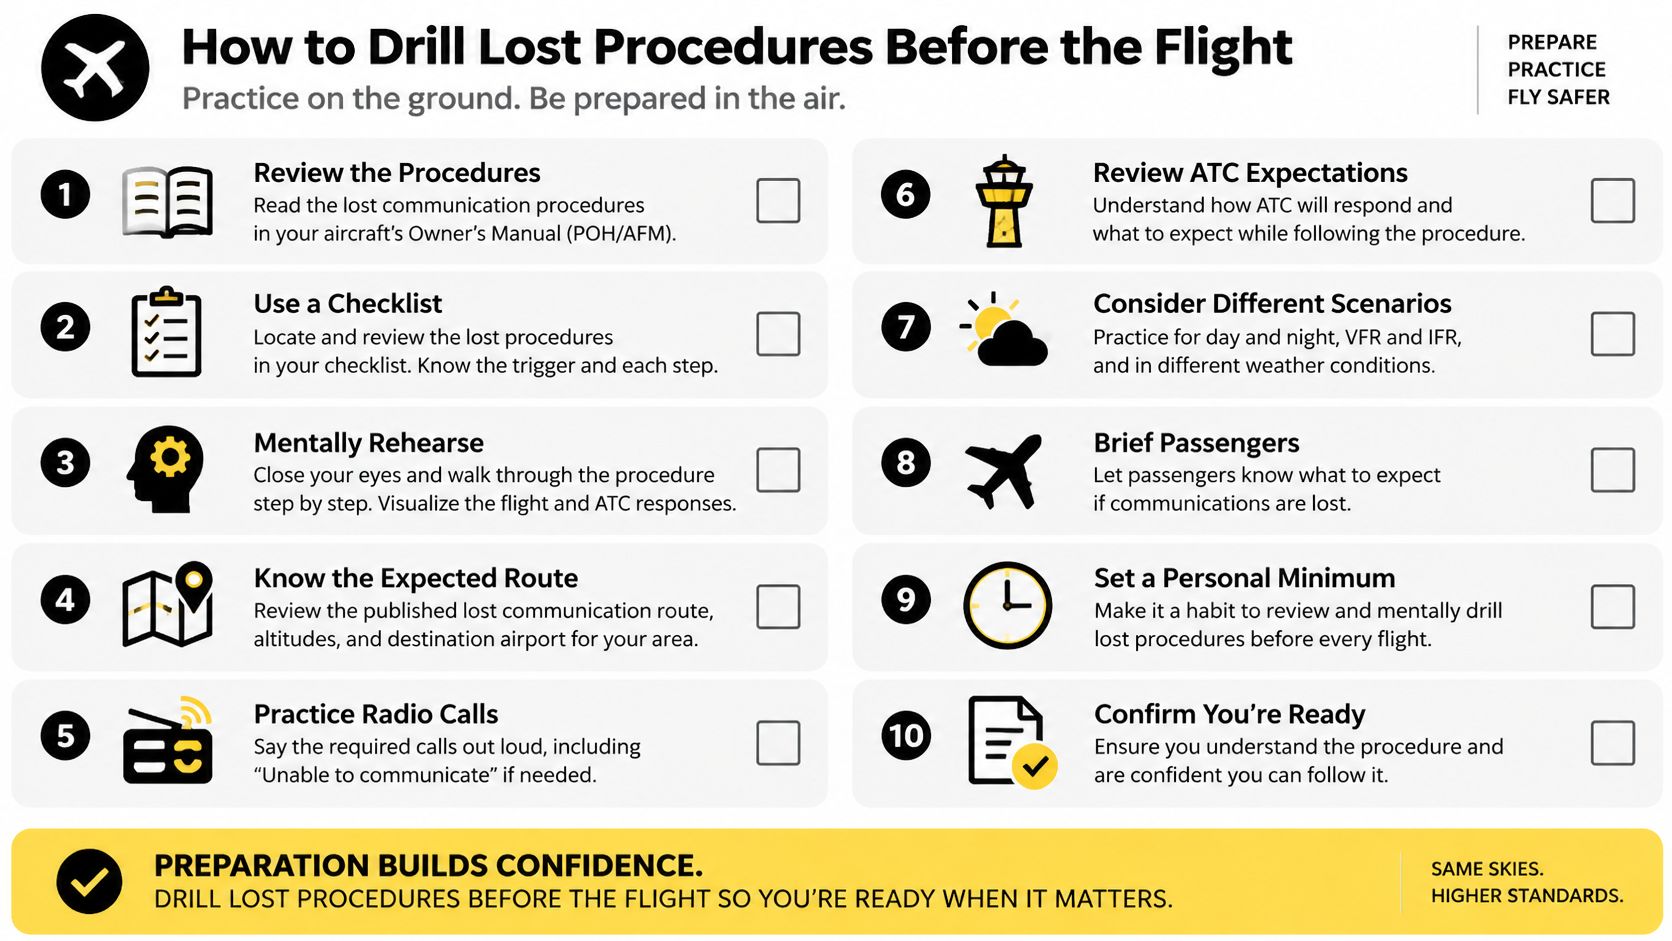
How to Drill Lost Procedures Before the Flight
A useful rehearsal makes you choose actions, not merely recite an acronym. Your instructor should be able to ask what you believe failed, what evidence supports that belief, and what you'll do if the next recovery attempt doesn't work.
Our training follows the FAA's Airplane Flying Handbook, which calls checklists the foundation of pilot standardization and flight deck safety. Our checklist training also references Advisory Circular 120-71B on standard operating procedures and pilot monitoring duties.
Put a readable card on your kneeboard
We teach read-and-do for rare or high-stress tasks and do-then-confirm for routine flying. For a lost-communications rehearsal, read-and-do helps prevent skipping an unfamiliar action while your attention is divided.
Use this practice card with your instructor and the airplane's approved procedures:
- Aviate. Establish a safe heading and altitude, trim, and maintain the appropriate outside or instrument scan.
- Check the communication path. Inspect audio-panel selection, volume, squelch, headset connections, microphone, and selected frequency.
- Try alternatives. Use the previous frequency, Flight Service, or the emergency frequency; transmit identification, problem, position, altitude, and intentions when broadcasting blind.
- Identify the failure. For lost two-way radio capability, select 7600 while continuing aircraft control and navigation.
- Choose the governing branch. Decide whether visual continuation and landing apply or whether the instrument route-and-altitude hierarchy governs.
- Brief the outcome. State the intended airport, navigation source, fuel endurance, and the condition that would trigger a different decision.
The FAA's air traffic control guidance says an aircraft losing two-way radio capability can be expected to select Code 7600, allowing controllers to apply communications-failure procedures. Don't turn troubleshooting into a requirement to exhaust every imaginable alternative before signaling the problem.
Rehearse decisions without creating a real failure
Begin on the ground with the airplane secured. Point to the audio-panel controls, identify the active and standby frequencies, and explain how you would recognize a transmit-versus-receive problem.
During a dual flight in good weather, let the instructor describe simulated failures while preserving actual communications and safe operation. Then add a disagreeing GPS indication and see whether you keep flying rather than becoming absorbed in the display.
Use scenario-based training to vary the problem. A wrong frequency tests something different from a navigation failure with worsening weather.
Training standard: Finish the exercise able to explain where you are, what still works, and why your next action is safe.
Debrief the decisions, not just the missed switch. Ask whether you communicated early, verified position independently, and chose a landing option before your margins became uncomfortable.
Fly the Lost Call Before You Need It
Practice the words before the cockpit gets busy. A lost call is a tool inside a larger chain: fly the airplane first, confirm position with something independent, then decide whether the problem is VFR uncertainty, an IFR radio failure, or both. A 7600 squawk covers lost communications only. The VFR-versus-IMC split in 14 CFR § 91.185 still belongs to the pilot.
Build a transmission that gives ATC usable pieces in one breath:
“[Facility], [call sign], uncertain of position. Last reliable fix was [checkpoint] at [time]. Now heading [heading] at [altitude], fuel [hours plus reserve]. Request position assistance or vectors. Intention is [continue, divert, or land].”
Say it aloud in the car, then fill the blanks during a preflight brief. If any field sounds fuzzy, that field is the item to fix before takeoff.
Make the first flight a learning session
CFII's one-hour discovery flight is lesson one: no experience needed, you meet the instructor, preflight the airplane together, and take the controls in the air. You can take that flight and the first lessons before obtaining a medical certificate; arrange a third-class FAA medical certificate from an aviation medical examiner before solo flight, and raise medical eligibility early if a flying career is the goal.
Ask practical questions before committing
Ask every school, including CFII, about airplane age, students per airplane, instructor turnover, total price in writing, Part 61 versus Part 141, and whether you can fly before committing. Those answers show how training works on an ordinary day, not just on a sales call.
Learn how to request VFR flight following while you are still getting comfortable with ATC. An established conversation can make position assistance easier to ask for, while your own cross-check still decides whether the answer makes sense. On an early lesson, ask the instructor to add a short position-uncertainty scenario and grade the whole chain: control, cross-check, call, choice.
At CFII, the zero-to-CFII Career Track runs about nine months at a fixed $89,000 tuition, logs 282 total hours, covers six certificates and ratings, and trains across Riverside, Long Beach, and Corona. Ask to practice aircraft control, an independent position check, and a clear lost call before those skills are needed for real.
Planning to fly for a living?
See what the path from zero to a pilot career looks like, what it costs and how long it takes.
Learn to fly in Riverside
We train at Riverside Municipal Airport in modern airplanes with a parachute built in. Start with a one hour discovery flight, no experience needed.