

On this page
- Instrument Flight Rules at a Glance
- VFR and IFR Compared
- Why Instrument Qualification Matters
- The Chain Pilots Are Trained to Break
- How ATC Clearances Work From Ground to Cruise
- Six Steps From Filing to Flying the Clearance
- Decision Altitude, MDA and When You May Descend
- The Chart Number Is Not Always Your Number
- Three Conditions Before You Descend Further
- Missed Approaches and the Climb You Need
- What 200 Feet per Nautical Mile Means in the Cockpit
- A Four-Step Missed Approach Briefing
- Fuel and Alternates Beyond the Destination
- When an Alternate Is Required
- When GPS Fails and Your Backup Must Work
- Four Decision Gates Before You Enter IMC
- Choose Your First Step Toward an Instrument Rating
Instrument flight rules are the rules and procedures for flying by reference to instruments under air traffic control clearance, used when clouds or low visibility remove outside references. You're probably reading this before you've logged a single hour, wondering how pilots legally fly through cloud instead of waiting for a clear day. That system isn't a trick for brave pilots. It's a structured set of clearances, minimums, fuel rules, and backups that you learn step by step, long before you rely on it alone.
Instrument Flight Rules at a Glance
A cross-country lesson is planned, but a solid cloud layer covers the route. Under visual flight rules (VFR), the pilot must remain clear of clouds or change the route. Under instrument flight rules (IFR), a pilot with an instrument rating may fly through cloud in an appropriately equipped airplane after receiving an air traffic control (ATC) clearance.

The difference is similar to driving on a clear road versus following instruments and directions when fog hides the road. IFR replaces outside visual references with instrument indications, navigation guidance, and ATC instructions. Each plays a different role: instruments show the airplane's condition, navigation aids help establish position and course, and ATC issues clearances and traffic instructions.
VFR and IFR Compared
| Factor | VFR | IFR |
|---|---|---|
| Primary reference | Outside visual references | Cockpit instruments and navigation aids |
| Air traffic control clearance | Not required in uncontrolled airspace | Required to operate under IFR in controlled airspace (14 CFR 91.173) |
| Flight plan | Optional | Required to operate under IFR in controlled airspace |
| Certificate needed | Private pilot certificate | Pilot certificate plus instrument rating |
| Weather allowed | Weather must meet applicable VFR minimums | Clouds and reduced visibility, within equipment and approach limits |
| Typical use | Fair-weather local and cross-country flying | Flights that require instrument procedures, including in clouds or low visibility |
One airplane may be flown under either set of rules, depending on the pilot's qualifications, working equipment, and clearance. IFR is not permission to enter cloud whenever weather worsens. The pilot must be qualified, the airplane must meet applicable equipment requirements, and ATC must issue a clearance before the flight operates under IFR.
A common VFR-to-IFR planning mistake is treating the clearance as the whole solution. A clearance does not establish that the airplane can complete an approach, climb after a missed approach, or continue safely if GPS becomes unavailable. Those are planning decisions with their own limits and backup requirements.
Why Instrument Qualification Matters
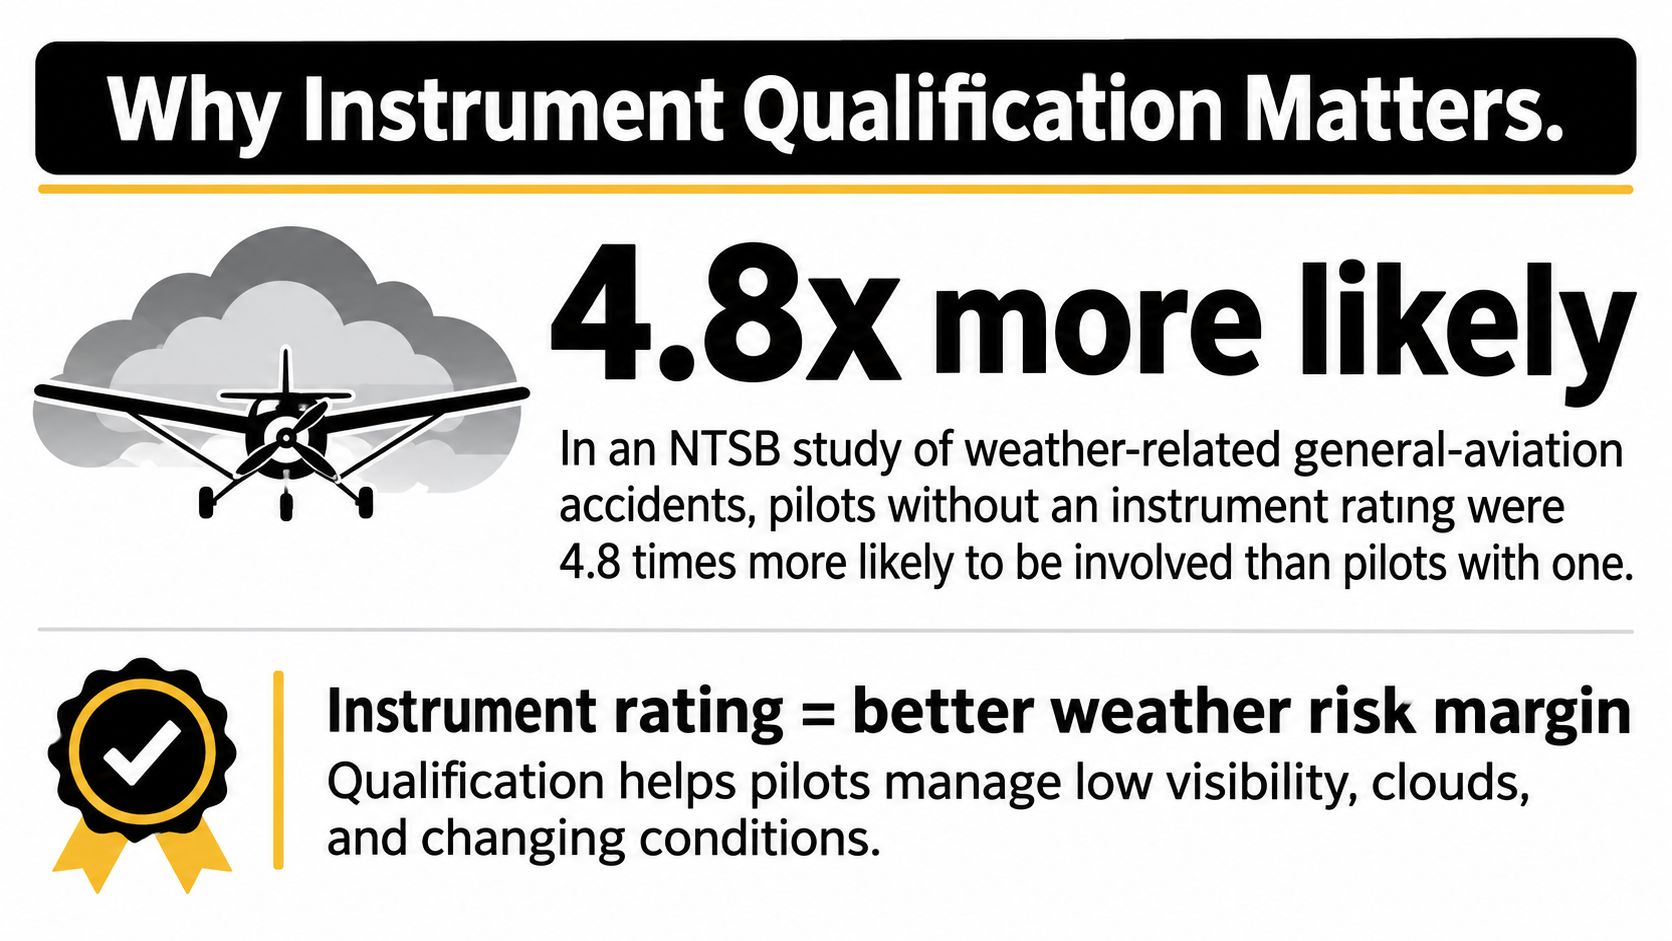
A pilot cruising above a solid cloud layer may have no visible horizon to help judge whether the airplane is level. Instrument training teaches pilots to control the aircraft by reference to its instruments and to follow procedures designed for flight in reduced visibility. In an NTSB study of general-aviation weather-related accidents, pilots without an instrument rating were 4.8 times more likely to be involved in a weather-related accident than instrument-rated pilots.
Instrument meteorological conditions (IMC) are conditions in which clouds or reduced visibility prevent a pilot from reliably navigating by outside visual references. Accidents in IMC are less common than accidents in visual conditions, but they are often more severe. A National Transportation Safety Board statistical compilation examined 361 general-aviation accidents from 1983 through early 1987 in which VFR flight into IMC was identified as a probable cause or related factor. Of those, 276 were fatal and resulted in 583 deaths; airplanes accounted for 94% of the aircraft involved.
The Chain Pilots Are Trained to Break
A pilot may depart or continue in visual conditions, then encounter cloud or deteriorating visibility and lose reliable outside references. The inner ear can misread motion, creating spatial disorientation: a pilot may feel that the airplane is turning or climbing when it is not. That confusion can lead to loss of control.
Instrument qualification trains pilots to rely on the aircraft's instruments and to follow established procedures when visual references are unavailable. Those skills support safer decisions before and during a flight, including recognizing when weather makes a trip unsuitable. Thunderstorms, icing, and fog remain hazards, and an instrument rating does not make every flight safe to attempt.
For pilots pursuing a career, instrument flying is a foundation for operating in conditions where outside visual references are limited. Training develops the judgment to use instruments, follow procedures, and make weather decisions early.
How ATC Clearances Work From Ground to Cruise
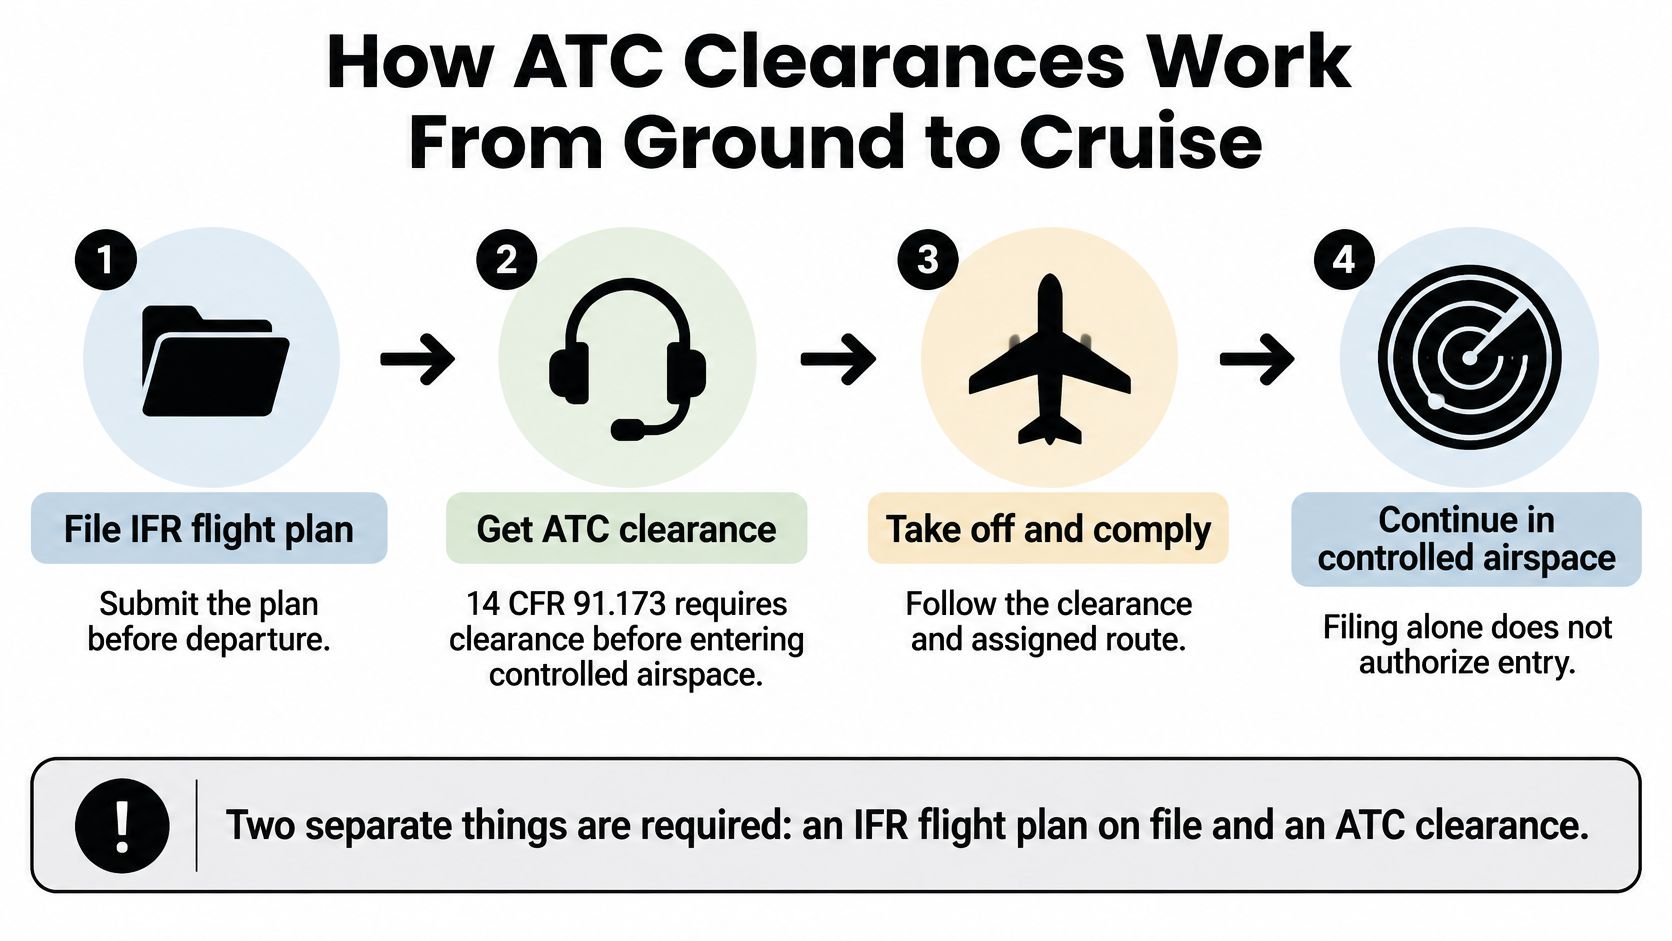
An IFR departure involves two separate steps: filing the flight plan and receiving an ATC clearance. Under 14 CFR 91.173, an aircraft operating under IFR in controlled airspace must have both. Filing gives ATC your planned route and altitude; the clearance gives you permission and instructions for proceeding in controlled airspace.
Six Steps From Filing to Flying the Clearance
- File the IFR flight plan: Submit your route, altitude, and aircraft details before departure so ATC can plan around your intentions. This guide to filing an IFR flight plan explains the information you'll provide.
- Obtain the clearance: Before taxi, request it from clearance delivery or ground control. The clearance specifies how to proceed under IFR in controlled airspace.
- Copy it accurately: Write down the route, altitude, departure instructions, and transponder code. A written copy helps prevent errors when entering fixes or setting the assigned altitude.
- Read back required items: Repeat instructions such as altitudes, headings, and runway assignments so ATC can catch misunderstandings before departure.
- Note any void time: Some clearances include a time by which you must depart. If it passes, contact ATC for instructions rather than departing on the expired clearance.
- Fly the clearance and expect amendments: Follow the clearance you received until ATC changes it or approves a change you requested.
Practical rule: If you did not copy and read back the clearance, you do not know what you were cleared to do.
Read-back is an error check, part of the same discipline as checklists. CFII's training follows the FAA's Airplane Flying Handbook, which describes checklists as the foundation of pilot standardization and flight deck safety. It teaches read-and-do for rare or high-stress tasks, and do-then-confirm for routine flying.
The filing-and-clearance requirement applies to operating under IFR in controlled airspace. Reduced visibility alone does not determine whether a flight needs an IFR clearance; the relevant factors here are the flight rules and the airspace.
Decision Altitude, MDA and When You May Descend
Every instrument approach answers one question. How low may you go before you must see the runway environment or give up and climb away? Two terms control that decision, and they aren't interchangeable.
An approach with vertical guidance, such as an ILS that gives you both course and glidepath, uses a decision altitude or decision height (DA/DH). A lateral-only approach, which guides you left and right but not down a glidepath, uses a minimum descent altitude (MDA). Under 14 CFR §91.175, an instrument approach with vertical guidance uses a decision altitude/height (DA/DH), while a lateral-only approach uses a minimum descent altitude (MDA).

The Chart Number Is Not Always Your Number
Students assume the minimum printed on the approach plate is automatically their minimum. It may not be. The authorized DA/DH or MDA is the highest applicable value among the procedure minimum, the pilot-in-command's authorized minimum, and the minimum compatible with the aircraft equipment available and used.
Say a navigation component you planned to use fails during the approach. The published procedure hasn't changed, but your controlling minimum can rise because the equipment available to you has changed. That's why a briefing that only reads the chart number out loud is incomplete. A fuller explanation of IFR minimums shows how those values interact.
Three Conditions Before You Descend Further
You may continue below DA/DH or MDA only when all three are true:
- Positioned for a normal landing: The aircraft remains continuously positioned for a normal descent and landing, not diving or swerving at the last moment.
- Visual references visible: The required visual references are distinctly visible, so you can identify the runway environment with confidence.
- Flight visibility met: The prescribed flight visibility is met for that procedure.
If you reach DA/DH or the missed approach point without those conditions, you don't descend a little farther hoping the runway appears. You fly the missed approach.
The same rule applies if you had the runway in sight and then lose it before touchdown. You execute the published missed approach immediately rather than continuing down on instruments alone.
Approaches themselves aren't improvised. Section 91.175 also requires use of a standard instrument approach procedure prescribed under Part 97 when an instrument approach to a civil airport is necessary, unless the FAA authorizes otherwise.
Before descent, your briefing should therefore state four things out loud. Name the minimums you'll use, the required visibility, the missed-approach routing, and your equipment status. If any one of those is fuzzy, you aren't ready to start down.
Missed Approaches and the Climb You Need
You reach the missed approach point in cloud and the runway is still out of sight. Now the airplane must follow the published missed approach and climb as specified. Obstacle protection assumes you begin at DA/DH, or at the missed approach point on an MDA-based procedure, without descending below MDA, according to FAA instrument-procedure guidance. The standard published climb gradient is at least 200 feet per nautical mile, unless the procedure specifies a higher value.
What 200 Feet per Nautical Mile Means in the Cockpit
Your vertical speed indicator reads feet per minute, but the gradient is feet per nautical mile. Convert the required gradient using groundspeed: the faster you travel over the ground, the more feet per minute you must climb to gain the same height over each mile.
| Groundspeed | Gradient required | Climb rate needed |
|---|---|---|
| 100 knots | 200 feet per nautical mile | About 333 feet per minute |
| 120 knots | 200 feet per nautical mile | 400 feet per minute |
| 150 knots | 200 feet per nautical mile | 500 feet per minute |
For a quick cockpit estimate, 200 feet per nautical mile works out to roughly 3.3 times your groundspeed in knots, giving the required climb rate in feet per minute. At 120 knots, for example, plan on about 400 feet per minute. A heavily loaded airplane on a hot day at high density altitude may not manage that rate, so assess performance before starting the approach.
Compare the procedure's climb requirement with the airplane's expected performance at the planned weight, density altitude, wind, power, and configuration. If the margin is inadequate, consider whether slowing down, choosing another procedure, or changing the plan for a future leg would address the limitation.
Three factors can reduce the climb margin:
- Delayed initiation: Starting after the decision point leaves the airplane lower and closer to obstacles than the procedure assumes.
- Excessive speed: Greater groundspeed requires a greater climb rate to maintain the same gradient.
- Slow configuration: Drag from an untimely configuration change can reduce climb performance during the initial climb.
A briefing of missed approach procedures helps turn the climb requirement into a decision made before the approach begins.
A Four-Step Missed Approach Briefing
- Brief the route before descent, including the first heading, altitude, and fix.
- Call the missed approach point aloud so the decision point stays clear.
- Apply power and configure the airplane on time, following its procedure.
- Climb at the published gradient toward the assigned routing or holding fix, then tell ATC.
Brief the missed approach on every approach. A go-around is a planned maneuver when conditions call for it.
Fuel and Alternates Beyond the Destination
Suppose your destination is reachable, but the weather prevents a landing. IFR fuel planning accounts for the next step: flying to an alternate when one is required, with a reserve remaining afterward.
Under 14 CFR §91.167, an aircraft operating under IFR must carry enough fuel, considering reports, forecasts, and actual weather, to fly to the first intended landing airport, then to the alternate airport when required, and then continue for 45 minutes at normal cruising speed. The rule specifies a 30-minute reserve for helicopters.
The sequence is cumulative: destination fuel, then alternate fuel, then the final 45-minute reserve, in that order.
The legal minimum is only a starting point for planning. Allow for:
- Taxi fuel: Fuel burned before takeoff is unavailable for the flight.
- Routing changes and winds: The route and winds ATC provides may differ from those you filed.
- Holding and approaches: An approach, a missed approach, or holding adds fuel use beyond a simple leg calculation.
When an Alternate Is Required
The 1-2-3 rule in 14 CFR 91.169 determines when an alternate is not required based on the destination forecast. The FAA Instrument Procedures Handbook chapter explains the rule: from one hour before to one hour after arrival, the forecast must meet the destination thresholds shown below.
| Planning check | Ceiling | Visibility | Regulation |
|---|---|---|---|
| Destination forecast to skip an alternate (1-2-3 rule) | 2,000 feet | 3 statute miles | 14 CFR 91.169 |
| Alternate with a precision approach | 600 feet | 2 statute miles | 14 CFR 91.169 |
| Alternate with a nonprecision approach | 800 feet | 2 statute miles | 14 CFR 91.169 |
| Alternate with no published instrument approach | Must allow basic VFR descent, approach and landing | Not stated as a fixed value | 14 CFR 91.169 |
For an aircraft other than a helicopter, standard alternate minima are 600 feet and 2 statute miles when a precision approach is available, or 800 feet and 2 statute miles for a nonprecision approach, unless the procedure publishes different alternate minima. The IFR alternate minimums guide explains how these planning values differ from approach minimums.
Destination approach minimums tell you how low you may descend during an approach. Alternate planning minimums tell you whether an airport qualifies as a backup on paper. They answer different questions.
For example, a destination forecast showing a 1,800-foot ceiling during the arrival window falls short of the 1-2-3 rule's ceiling threshold, so an alternate is required. Check candidate airports against the applicable alternate minima, confirm the planned fuel covers the route, and keep monitoring the forecast.
These thresholds are planning tools, not guarantees of usable weather. Conditions at an airport that qualified when you filed may deteriorate en route, so updated forecasts and a fuel plan that preserves options matter.
When GPS Fails and Your Backup Must Work
Most modern training approaches are flown with GPS, and the button sequence becomes familiar quickly. The harder question gets less attention. What do you do when the signal or the system's integrity degrades in cloud, where you can't look outside and use landmarks?
FAA guidance states that when GPS or WAAS capability is lost, pilots must notify ATC and communicate their proposed course of action. FAA alternate guidance also emphasizes that, when the applicable conditions cannot be met, a required alternate may need an operational instrument procedure other than GPS that the aircraft is equipped to fly.

Knowing how to load an RNAV approach doesn't answer what to do with an integrity alert, signal loss, a database concern, or regional interference that invalidates your plan. Treating GPS failure as a single abnormal checklist item misses the planning problem underneath it, which involves route selection, fuel, terrain, approach availability, and ATC coordination.
Four Decision Gates Before You Enter IMC
- Verify independent navigation capability: Confirm what still works if GPS doesn't, including conventional receivers and your ability to use them. Ground-based skills such as VOR navigation are part of that backup.
- Identify usable alternatives: Find VOR, ILS, or radar-vector options at your destination and alternate before departure, not during an alert.
- Check NOTAMs and prediction tools: Look for outages, interference notices, and procedure availability that affect your route and arrival window.
- Set diversion triggers in advance: Decide on the ground which alert, fuel state, or weather change sends you to the backup plan, so the decision isn't improvised under workload.
Satellite-navigation dependence and conventional NAVAID availability differ by country and airport. A backup that exists at one airport may not exist at the next, so pilots moving between regions check each destination rather than assuming yesterday's redundancy travels with them.
Redundancy isn't just GPS versus VOR. It's the combined resilience of your aircraft equipment, the published procedures available, the ground infrastructure, your weather information, and your own workload. A plan that depends on one signal, one approach, and one airport has no depth when any single element fails.
Choose Your First Step Toward an Instrument Rating
The instrument rating is what lets you fly the IFR column of the first table. You learn to accept clearances, fly approaches to published minimums, execute missed approaches, and plan fuel and alternates under 14 CFR 61.65, which sets the instrument aeronautical experience, knowledge test, and practical test you complete after earning your private pilot certificate.
Before committing anywhere, we recommend asking every flight school, including us, about airplane age, students per airplane, instructor turnover, total price in writing, Part 61 vs Part 141, and whether you can fly before committing. Vague answers on price or scheduling usually stay vague after you enroll.
Start with a discovery flight, a first flight with an instructor before committing. You'll meet the instructor, preflight the airplane together, and take the controls in the air, with no prior experience needed. A third-class FAA medical certificate from an aviation medical examiner is required before flying solo, but the discovery flight and first lessons can be taken before obtaining one.
If that flight confirms you want the career, our Career Track is the full zero-to-CFII path at a fixed $89,000 tuition, about nine months from zero time to CFII and multi-engine, with 282 total hours and six certificates and ratings, including the instrument, commercial, and multi-engine ratings on the way to flight instructor. Training is based in Riverside, Long Beach, and Corona in Southern California. Book the discovery flight first, then compare the full path against your budget and timeline with real experience behind the decision.
If instrument flight rules are the system you want to build a career on, start by experiencing the cockpit where clearances, checklists, and approaches stop being abstract. Visit CFII to book a discovery flight or explore the fixed-price Career Track from zero time to CFII and multi-engine in Southern California.
Planning to fly for a living?
See what the path from zero to a pilot career looks like, what it costs and how long it takes.
Learn to fly in Riverside
We train at Riverside Municipal Airport in modern airplanes with a parachute built in. Start with a one hour discovery flight, no experience needed.

